Friday 14 December 2012

Final title perpective views


Final Digital Turnarounds


Overall, the final product of everything,. I do think that the turnaround on the robot needs editing due to transforming but the overall model is probably my best model yet. I like my texturing eventhough I probably need to go back in to the UVs and edit to make some parts a bit clearer. I also need to create a pose for the final hand in but due to my amount of time, I couldnt do this essential part. Very happy with the robot though.

The mulefa, i'm actually pretty happy with the model itself. I do need to change some vertexes because there is some random shadow occurences, but apart from that, I was happy.The texturing lets itself down a bit buut I didnt really know how to design this part. I'll go back to the mulefa for the final hand in, edit the UVs and then re-do the whole texture. I had a problem with lighting so this was where my problem happened.

Overall though, at where were at with the project right now, happy with what im handing in right now.

Mapping for both Models


Mapping Styles for both the Mulefa and Ashley Wood Robot. For the texturing, the Ashley Wood Robot I was impressed with and I think it looks well developed and works well together as I did take into account the final colouring and seem edges. When it comes to the mulefa texture sheet, I did rush but I did find it complicated to place the eyes due to the UV setup. When it comes to coming back to this, I will develop the UV setup more and the overall texture sheet and make that better.

The ambient occlusion maps im generally impressed with and I used them, mainly in the mulefa, when creating my texture sheets. Not as much in the final texture for the robot due to the fact there was a multitude of colours I use, but I still used it as reference.

The normal map for the robot, I used quite a unique techniue which Ken taught me in class. Using a plane for the cage instead of the actual robot and then adjusting it in photoshop, really helped speed up this process. The transofmr kind of wrecked it in the final normal map, so the final hand in, ill make this inital part better.

Turnarounds - Both Mulefa and Robot


These are the final drawn turnarounds for both the Ashley Wood Robot and Mulefa Models.

I really like the Ashley Wood drawn turnaround as I think its drawn both appropiately and quite fine. I used these well when it came to the final modelling and used them to create all the model and accessories. I had to go through multiple versions to get to the final outcome. I do think using the Sai Program helped my work a lot as it's a lot more fine and precise as a whole.

The mulefa prints i'm quite happy with but I do think I will come back to the Mulefa perspective view. These werent as easy to use when it came to modelling but repsectively, I used these as a good template to model for the final hand in.

Tuesday 11 December 2012

Normal Mapping

Due to the complication of caging in my model, Ken taught me a new way of creating normal maps but having the voerall same effect. Creating the high poly and projecting it to an unwrapped 1x1 plane. Then transforming that in photoshop and placing it in the appropiate places on a picture of the UV unwrap template. Worked really well and overall looks really good on screen when adding it to models

Monday 10 December 2012

Combat Ability Pictures

Astrological Power

Countering

Grapple

Guarding

Strike

Parry
Weapon Attack
These being the main 7 combat abilities in battle, I wanted to show these off because I think these represent the information required in this specific part of my concept document. These are to help my doucment look nicer and to show an emblem of he design im thinking off

Sunday 9 December 2012

Stat Tables for Concept Document


These represent the different 8 stats that characters have. I wanted to make this part simple due to the fact its only meant to be a concept document and it would again take time off my work. This is what the different letters mean


  • STR - Strike - Damage of normal kicks and punches
  • WST - Weapon Strike - Damage of weapon abilities
  • CTR - Efficiency of countering attacks 
  • GRB - Efficiency of Grappling Moves
  • GRD - Capability of Guarding against opponents
  • SPD - The overall speed of the character
  • MVE - Amount of move potential the character has
  • AAP - The impact this character's astrological ability and power have.

Character Designs for Concept Document


All my character designs compiled into 1 blog post.

These characters are meant to represent either an element or a star sign. I really wanted to stick with the manga art style due to 2 reasons.

1) Being because this is an art style im comfortable with and I think trying a new concept and style would elongate the process while this was done quickly.
2) Secondly because it suits the game. The game has quite a radical manner anyway so I think using the influence of the manga style characterizes the game better and makes the game more attractive as a whole.


Mulefa Blueprints without perspective

Using the same kind of process I used to design the Ashley Wood Robot, i designed the mulefa in Photoshop and then created finer lines using the Paint Program, Sai.

This is how im going to model my mulefa and overall, i think i've depicted my thoughts when initially hearing about it. I do think I may have a problem with he body due to the sizes being wrong but I don't think it'll have  too much effect.

Looking forward to modelling it. Shall see if it is easy or not.....

Design for Concept Document

This shall be the design page that is themed throughout the whole of my concept Document. I really wanted to look at a star type feel to the document due to my game idea being about the star signs. Using a gradient of different shades of blue and then adding the symbols of each star sign to the side of the pages. Then creating a simple border between them on each side to create an overall final image . Between the borders and page, I then created little white spots which glistened to create stars. Overall , I was very happy with this part.

Creating them in IN Design was the next step

"Normal" Design Life Cycle Assessment, what its doing

Prime to what I think the normal design principles are. We can change this for the better through sustainable design and this life cycle of resources and products can be avidly changed for the better as long as we stick firm to our choices when using the principles behind our backs.

All the negative things that the normal design principles create can be changed but without the humans help, this can really go nowhere so im hoping in my essay to show what this life cycle is doing to our environment.

The difference between the words green & sustainable

I really wanted to post this extract from an article online as it really helped me understand more about the word sustainable and tried to derive away from the word "green".


The idea of energy efficient, healthy buildings has been around for a long time, so why is it just now that the concept of “green” or “sustainable” building is entering the mainstream and catching the attention of fortune 500 companies like Wall Mart, Dupont, and Home Depot? There are probably several reasons; Global Warming, rising energy costs, the growing awareness and liability costs associated with “Sick Building Syndrome”, declining oil reserves, and concerns about our limited water supply. The list goes on, but whatever the reason or reasons, sustainable building is a concept whose time has come.
Which begs the question, what is IT? The ultimate definition depends on how one defines “green” as opposed to how one defines “sustainable”.
My personal definition of “green” is relatively simple. A home’s design is “green” if its serves to reduce many of the harmful impacts buildings have on our environment and our home’s inhabitants. So “green” home design revolves around four key issues:
  1. Designing for energy efficiency including the use of renewal energy sources such as wind, geothermal, and solar.
  2. Creating a healthy indoor air environment with adequate ventilation and making material choices that minimize volatile organic compound (VOC’s) out-gassing within the home.
  3. Specifying building materials and resources that are sustainable, have low embodied energy, and produce a minimal amount of upstream environmental impact.
  4. Providing for the efficient use of water via appliance, faucet, and shower head choices and in arid climates by xero-scaping and recycling grey water and capturing rain water for landscaping and other non-potable uses.
However, the words “green” and “sustainable” are often used interchangeably, and sustainable has a more precise meaning that is often obscured, distorted, and diluted by the commercialization and marketing of the green “movement”. In the context of our built environment sustainable takes its meaning from "sustainable agriculture", or “the ability…to produce food indefinitely, without causing irreversible damage to ecosystem health”. If we accept this as the basis for the definition sustainable building everything changes. For example, a 5,000 SF home with a HERS index of 70, bamboo floors, and Energy Star appliances may be “green”, but it is NOT sustainable. In the context of Global Warming and even the most optimistic projections of Peak Oil and Gas, only a home that meets zero energy standards can be considered sustainable.
Really helped me define my essay to be more precise and more fine. These words are connected but in a sense less broad and more precise. I really do think that with this considered, i can develop certain parts of my essay further

Sustainable Design in Vehicles

http://reviews.cnet.com/8301-13746_7-57497703-48/on-the-road-in-six-electric-cars/

Using this site as a main reference, I discovered that there are already many cars on the road using eco-friendly fuel resources. Definitely going to use this as part of my essay.

Hybrid type cars. Bioenergy, electricity etc.


Prime examples of cars out there using sustainable design principles. By using safer fuel, car companies are helping global warming and prevent it it from happening to drastically on our planet and having a serious side effect.

Everything will be better explained in the essay....

Wednesday 28 November 2012

Torso, Arms & Hands


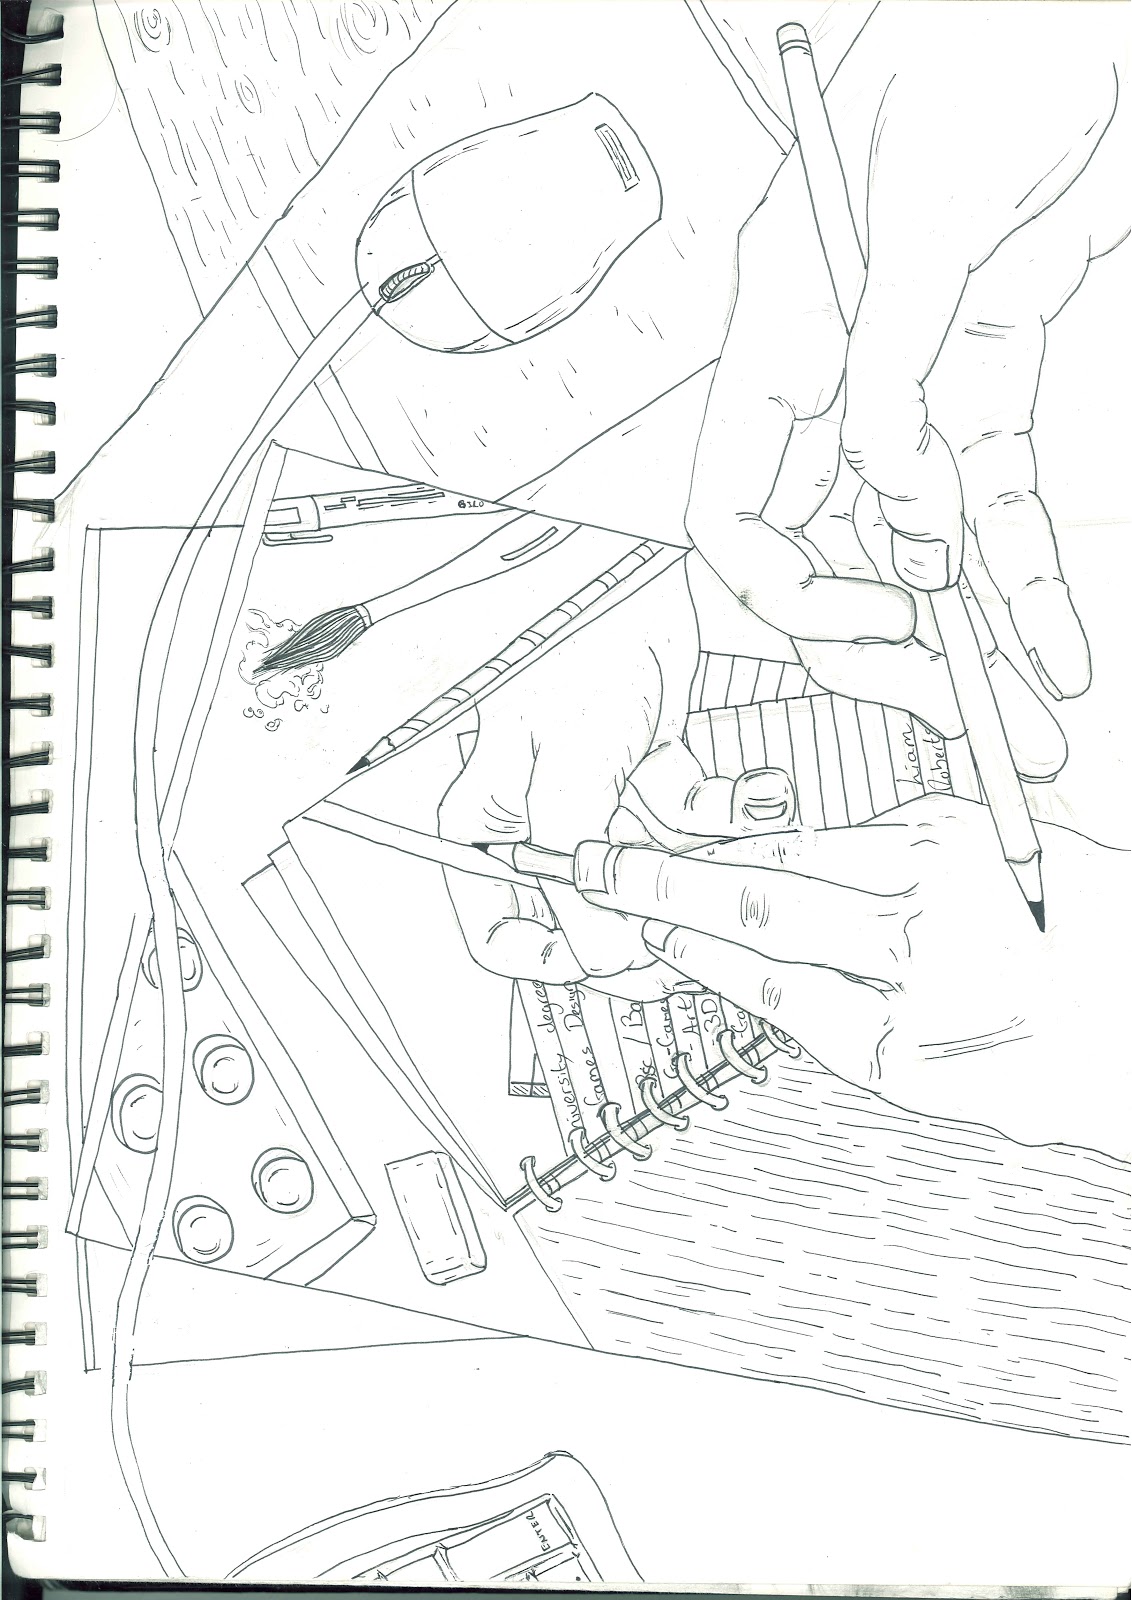
Drawing from the neck down this week mainly. Really wanted to study the torso and hand areas. The torso especially.

In the torso, I really wanted to look at the muscle area so I concentrated on the bits where this was most prominent. Creating the ribs area etc. It was really good to learn these areas..

The arms was something I was confident in anyway as the anatomy and muscles are pretty simple. Creating musclier arms are more complicated so I learned how to do this when creating my work.

When it came to hands, the hands drawings took me a while but I figured out eventually the structure of the hands. The hands are much more complex depending on the pose so my learning will always be developing. I'll probably use photo reference to do this. in the end.

Using Imagine FX Tutorials


I'm using these specific tutorials on Imagine FX to help with my anatomical processes. I really want to follow as many tutorials as I cna when it comes to this as I first, want to gather a lot of research and second get help from proper artists in the field.